Have you ever stopped to think about how much your laptop keyboard interacts with your daily life? From typing work emails to binge-watching your favorite shows, your keyboard is more than just a tool—it’s a gateway to productivity, creativity, and entertainment. But here’s the catch: with every keystroke, crumbs, dust, and grime settle into the crevices of your keyboard, turning it into a breeding ground for germs and potential performance issues.
Cleaning your laptop keyboard might not be the most glamorous task, but it’s an essential one. Not only does it extend the lifespan of your device, but it also ensures a smoother, more hygienic user experience. In this article, we’ll guide you step-by-step on how to clean your laptop keyboard like a pro.
Whether you’re dealing with stubborn crumbs or sticky keys, we’ve got you covered. By the end of this guide, you’ll have all the tools and knowledge you need to keep your keyboard in tip-top shape. Let’s dive in!
1. Understanding the Importance of a Clean Keyboard
Before grabbing a cloth or any cleaning supplies, it’s crucial to understand why maintaining a clean keyboard is so important. A dirty keyboard doesn’t just look unsightly; it can actually impact your laptop’s performance and even your health. For starters, accumulated dust and debris can interfere with the functionality of the keys. Over time, this buildup can cause keys to stick or become unresponsive, leading to frustration and decreased productivity.
But that’s not all. Studies have shown that keyboards can harbor more bacteria than a toilet seat. Think about it: how often do you eat or drink near your laptop? Every crumb or spill contributes to a microbial playground. Regular cleaning not only keeps your device running smoothly but also reduces the risk of transferring germs to your hands and face.
Beyond hygiene and functionality, a clean keyboard simply feels better to use. There’s something satisfying about typing on a pristine surface, free from sticky residue or mysterious particles under your fingertips. So, whether you’re a student, professional, or casual user, investing time in cleaning your keyboard is a small effort with big rewards.
2. Gathering the Right Tools for the Job
Now that you understand why cleaning your keyboard is essential, let’s talk about how to do it properly. The first step is gathering the right tools. Using improper materials can damage your keyboard, so it’s important to choose wisely. Here’s a list of items you’ll need:
Compressed Air : Perfect for blowing out dust and debris stuck between the keys.
Microfiber Cloth : Soft and lint-free, ideal for wiping down surfaces without scratching.
Isopropyl Alcohol (70% or higher) : An effective cleaning agent that evaporates quickly and won’t leave residue.
Cotton Swabs : Great for reaching tight spaces and cleaning around individual keys.
Small Brush or Toothbrush : Useful for gently scrubbing away stubborn dirt.
Keycap Puller (Optional) : If you want to remove keys for deep cleaning, this tool makes the process easier.
Once you’ve assembled your cleaning kit, you’re ready to tackle the next steps. Remember, using the right tools ensures both safety and efficiency, preventing accidental damage to your device.
3. Step-by-Step Guide to Cleaning Your Keyboard
With your tools in hand, it’s time to get down to business. Follow these steps to give your keyboard a thorough yet gentle cleaning:
Step 1: Power Down and Unplug
Before doing anything, turn off your laptop and unplug it from any power source. This not only protects your device but also ensures your safety during the cleaning process.
Step 2: Shake It Out
Flip your laptop upside down at a slight angle and gently shake it to dislodge loose debris. You’d be surprised how much comes out! Be careful not to shake too vigorously, as this could damage internal components.
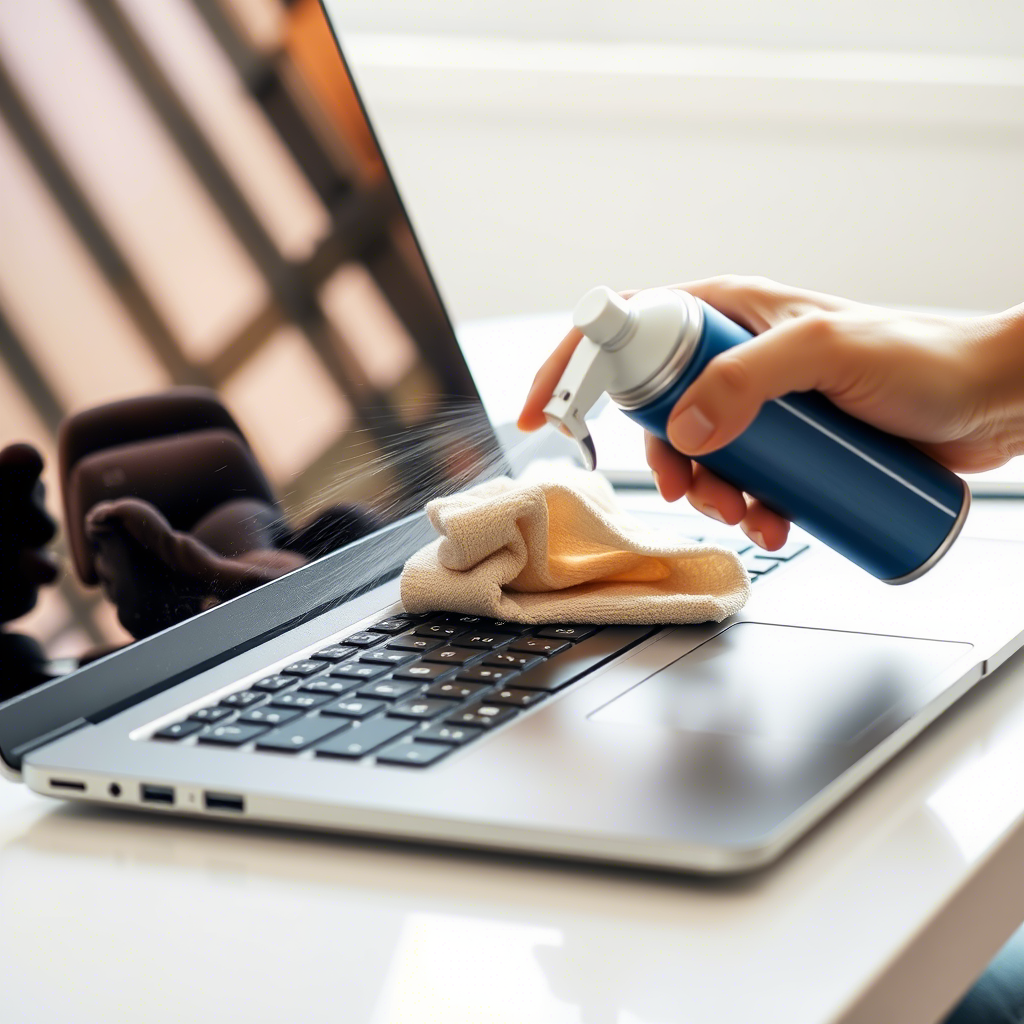
Step 3: Use Compressed Air
Spray compressed air between the keys to remove stubborn particles. Hold the can upright and use short bursts to avoid moisture buildup. For best results, tilt your laptop at different angles while spraying.
Step 4: Wipe Down the Surface
Dampen a microfiber cloth with isopropyl alcohol (never spray liquid directly onto the keyboard) and gently wipe the surface. Pay special attention to areas with visible stains or fingerprints.
Step 5: Tackle Sticky Keys
If certain keys feel sticky, dip a cotton swab in alcohol and carefully clean around their edges. For deeper cleaning, consider removing the keycaps using a keycap puller—but only if you’re comfortable doing so.
By following these steps, you’ll transform your keyboard from grimy to gleaming in no time!
4. Preventive Measures to Keep Your Keyboard Clean
Cleaning your keyboard is just one part of the equation. To minimize future messes, adopt some preventive habits. Start by keeping food and drinks away from your workspace. Spills are one of the most common causes of keyboard damage, and avoiding them altogether saves you time and hassle.
Consider investing in a keyboard cover, especially if you frequently work in environments prone to dust or spills. These thin, flexible covers fit snugly over your keyboard and provide an extra layer of protection without interfering with usability.
Lastly, make cleaning a regular habit. Set aside 5-10 minutes every week to perform basic maintenance, such as shaking out debris and wiping down the surface. Consistency is key to keeping your keyboard in pristine condition.
5. Advanced Tips for Deep Cleaning
For those willing to go the extra mile, deep cleaning involves removing the keycaps for a more thorough cleanse. While this method requires more time and effort, it’s incredibly effective for heavily soiled keyboards.
To start, use a keycap puller to carefully remove each keycap. Place them in a bowl of warm, soapy water and let them soak for a few minutes. Gently scrub each keycap with a soft brush before rinsing and drying them completely. Meanwhile, use a toothbrush and isopropyl alcohol to clean the exposed areas of the keyboard base.
Once everything is dry, reattach the keycaps in their original positions. This process may seem daunting at first, but with practice, it becomes second nature—and the results are well worth the effort.
6. Common Mistakes to Avoid
Even with the best intentions, mistakes can happen during the cleaning process. One common error is using excessive moisture. Liquids can seep beneath the keys and damage sensitive electronics, so always err on the side of caution. Another mistake is neglecting to unplug the laptop before cleaning, which poses a risk of electrical shock.
Additionally, avoid using abrasive materials like paper towels or harsh chemicals, as they can scratch or corrode the keyboard surface. Stick to the recommended tools and techniques outlined earlier to ensure safe and effective cleaning.
Conclusion: Elevate Your Laptop Experience
Cleaning your laptop keyboard may seem like a mundane chore, but it’s a vital part of maintaining a healthy and efficient workspace. By understanding its importance, gathering the right tools, and following a systematic approach, you can achieve professional-level results. Plus, adopting preventive measures ensures your keyboard stays cleaner for longer, saving you time and effort in the long run.
So, what are you waiting for? Grab your cleaning supplies and give your keyboard the attention it deserves. And don’t forget to share your experience in the comments below—did these tips help you master the art of keyboard cleaning? Your feedback inspires us to create more helpful content, so let’s keep the conversation going!

Marcos Vinicius is a passionate content writer and creator with a strong focus on digital communication. With experience in crafting compelling texts for various platforms, he specializes in creating engaging and strategic content that resonates with audiences. Whether through articles, social media posts, or marketing copy, Marcos combines creativity with precision to deliver impactful messages. Committed to continuous learning and innovation, he stays up-to-date with the latest trends in content creation and digital storytelling.